A Step-by-Step Guide to AdGuard Home Installation for Enhanced Browsing Privacy
Introduction
In a world saturated with online advertisements and privacy concerns, AdGuard stands out as a powerful solution for users seeking an ad-free and secure browsing experience. This article provides a comprehensive guide to installing AdGuard, empowering users to take control of their online interactions and enhance their privacy.
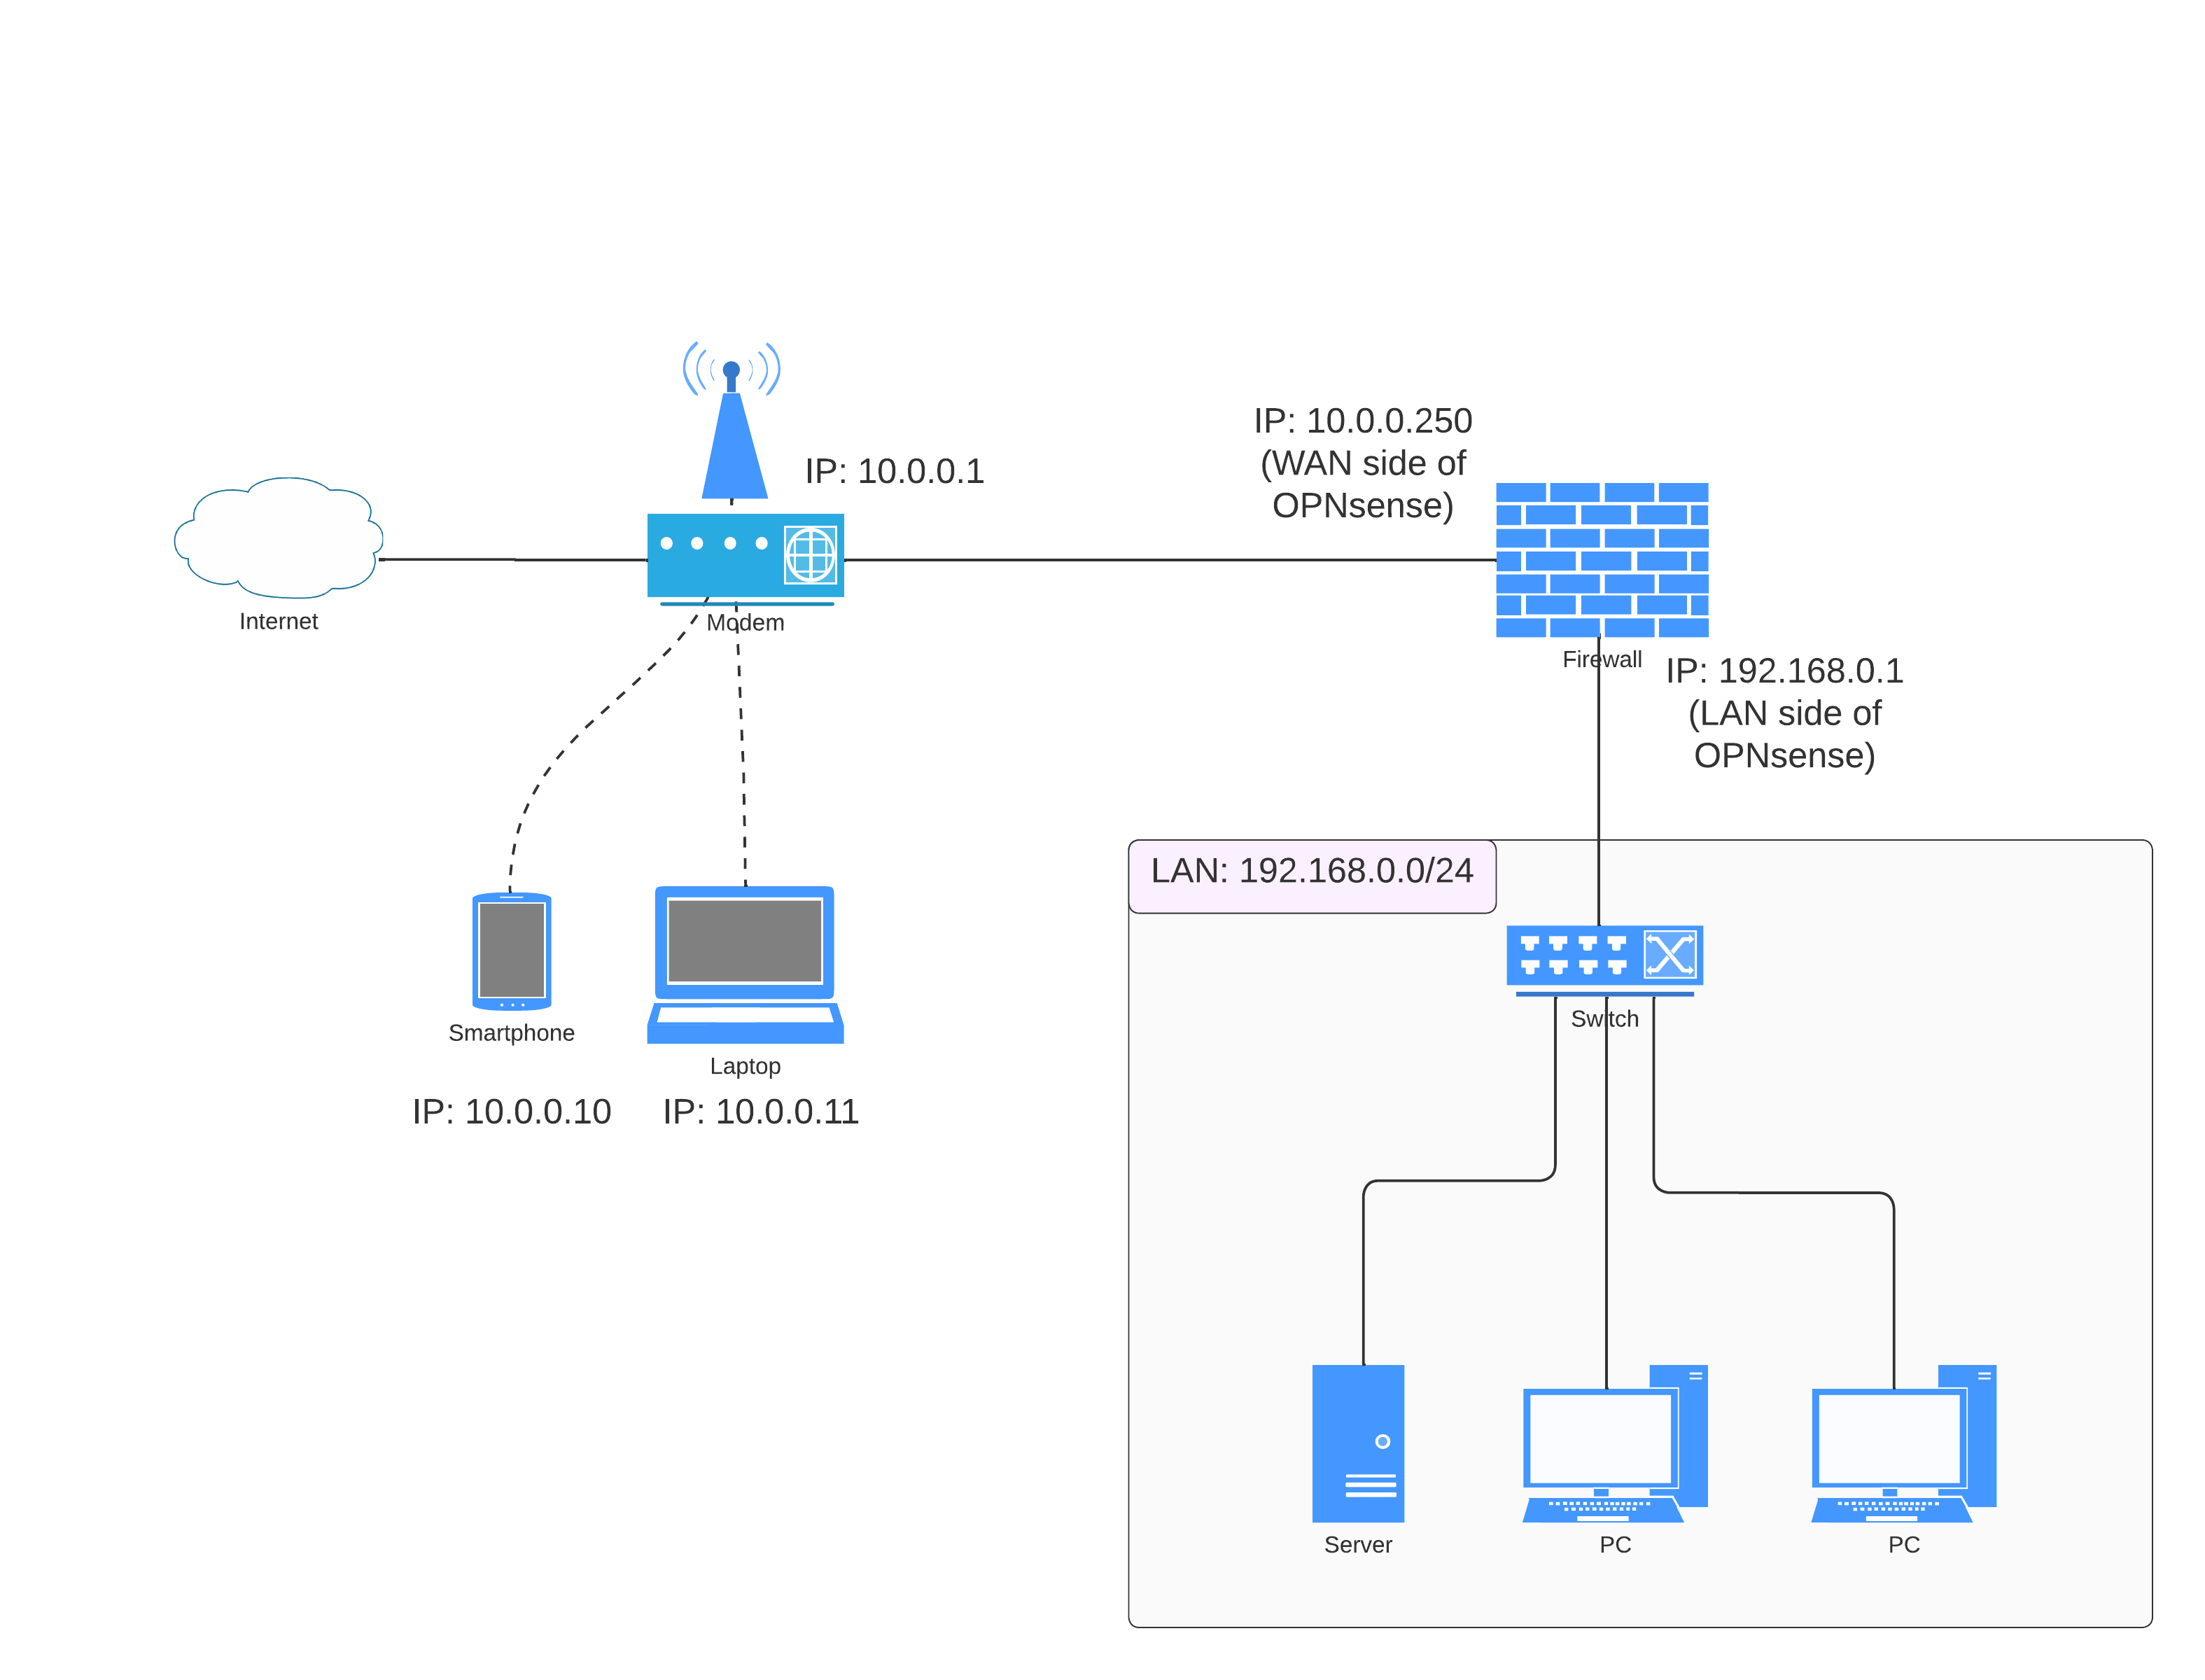
Within my current setup, a public IP is not in use. Rather, I’ve established a connection between my ISP modem and a custom OPNsense firewall. This firewall serves for now the purpose of safeguarding my lab, which constitutes the LAN portion of the network (from OPNSense Firewall perspective). Meanwhile, the WAN side of the OPNsense network continues to provide connectivity to my home network’s devices via Wi-Fi, as I’ve yet to allocate funds for a reliable and reasonably priced access point. As part of my ongoing efforts to bolster privacy, I’m planning to implement AdGuard on both network sides to ensure a heightened level of online security.
Unveiling AdGuard Home: Benefits and Functionality
Before diving into the installation process, let’s take a moment to shed light on the myriad advantages offered by AdGuard Home:
Bid Farewell to Intrusive Ads: Bid adieu to those intrusive ads and pesky pop-ups that disrupt your seamless browsing experience.
Guardian of Privacy: Safeguard your personal data from trackers and data harvesters, ensuring your privacy remains intact.
Ensuring Safe Browsing: Ward off potential threats by blocking access to malicious websites, bolstering your defense against online dangers.
A Speed Boost to Enjoy: Experience swifter page loading times as unnecessary content gets nipped in the bud.
In our digital age, there’s an escalating desire to avoid pervasive website tracking and minimize the deluge of advertisements. Regrettably, many websites employ automated scripts and code snippets, leaving users with limited options to opt out.
In yesteryears, specific browser extensions rose to prominence by autonomously intercepting and obstructing advertisement and tracking components. While these extensions proved (and continue to prove) effective, website owners contested them, making the task of content blocking progressively more arduous. Additionally, these extensions operate within the confines of your web browser.
This is where a new breed of ad blockers, functioning at the network level, come into play. One such solution is AdGuard Home, accompanied by counterparts like Pi-hole and NextDNS. These solutions typically find their place on your home network, operating as localized Domain Name System (DNS) servers.
When your browser embarks on retrieving content from the web, the initial step involves identifying the corresponding IP address. Your computer accomplishes this by communicating with its configured DNS server and supplying the website name (e.g., zp4-learning.com). The DNS server then retrieves the IP address linked with that name (e.g., x.x.x.x), thereby enabling your computer to establish a connection to the website.
Enter the realm of DNS-level blockers, with AdGuard Home at the forefront. This breed of blockers thwarts your computer’s attempts to initiate such connections in the first place. For instance, if you were to visit a website housing embedded advertisements or tracking elements (e.g., zp4-learning.com), AdGuard would signal to your computer that the domain hosting the advertisement is nonexistent (often by returning a 0.0.0.0 or NXDOMAIN response). As a result, your browser can load the primary site (zp4-learning.com) without any endeavors to establish links with advertisement or tracking components.
This methodology furnishes plenty of advantages, including heightened privacy and a decluttered browsing experience. Moreover, by removing much of this superfluous content, bandwidth consumption and associated data costs are curtailed. Moreover, potential performance enhancements are on the horizon, given the lighter content load for each site.
Security stands out as another significant advantage. A lot of DNS blocklists are continuously updated with the latest malevolent or suspicious domains. Swiftly intercepting and blocking clients from connecting to such domains fortifies overall security.
However, the question of drawbacks arises. Indeed, they exist. Many DNS-level blockers rely on diverse website blocklists, which may not invariably be 100% precise. Consequently, sporadic instances of advertisements or tracking elements slipping through are conceivable.
It’s an imperfect system, of course, otherwise it would be too easy. Furthermore, the reverse scenario can unfold—legitimate portions of websites might be erroneously barred. Considering the prevalent dependence on third-party components by numerous contemporary websites, occasional troubleshooting and manual unblocking might prove indispensable.
Step 1: Adding the Community Repository to OPNsense
When exploring the available plugins for download and installation in OPNsense, you might notice that AdGuard Home isn’t initially included. But no worries! A dedicated member of the community has taken the initiative to create an additional plugin repository, bringing in a selection of extra packages.
However, before we proceed with adding the AdGuard Home plugin, there’s a crucial step to complete – configuring and installing this community repository: enabling ssh connection to the OPNSense Firewall.
Browse to: System > Settings > Administration

In order to install the community repository, we’ll pull down the repository config file using the following command:
fetch -o /usr/local/etc/pkg/repos/mimugmail.conf https://www.routerperformance.net/mimugmail.conf
Then update local cache:
pkg update
Step 2: Installing AdGuard Home plugin
Now back to OPNSense web interface: System > Firmware > Plugins 
Then, browse to: Services > Adguardhome > General and enable the AdGuard Home service. You can also choose Adguard Home as primary DNS (For that it needs to run on port 53). 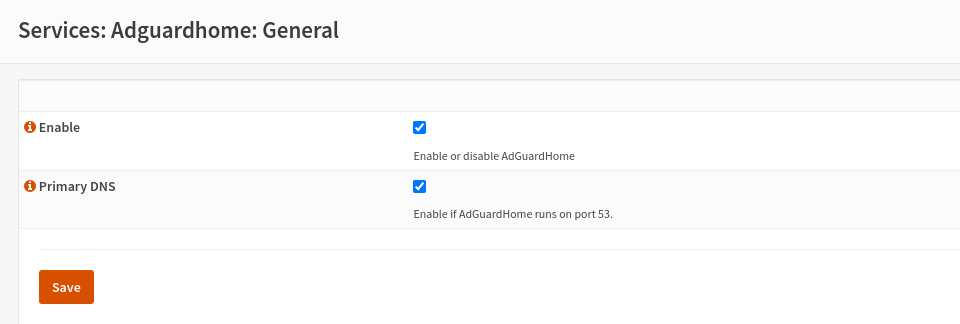
If you have a default DNS listening on port 53, such as my case with the Unbound DNS server, change its port to any of your choice; in my scenario, I opted for port 5353.
- Navigate to Services > Unbound DNS > General
- Change Listen Port to 5353
- Check Register DHCP leases and Register DHCP static mappings, this will resolve hostnames for us in AdGuard Home.
- Save the settings.
Step 3: Configuring AdGuard Home
We’re now ready to configure AdGuard Home via the web interface.
- Navigate to http://opnsense-ip:3000/ in your browser and follow the wizard.
- Configure the administration interface to listen only to the IP of your router (the LAN portion of your network), the same one used to configure OPNsense firewall.
In my case, I’ve chosen all interfaces, because I want devices in the same network as my router’s WAN interface to be able to benefit from AdGuard Home protection.
As a reminder, I have a double NAT: Internet -> modem: 10.0.0.1/24 (LAN1) -> WAN(LAN1):10.0.0.250 – opensense – LAN: 192.168.0.1 -> LAN: 192.168.0.0/24
3.The DNS server can listen on all interfaces and use the default port 53.
- In the next step, choose a user name and password.
- Once you’ve completed all these steps, you can log in to AdGuard Home using the credentials you’ve entered.
AND tadaaa! Now you have a working AdGuard Home instance. 
Optional: if unbound or any other DNS is used
In AdGuard Home, navigate to Settings -> DNS Settings and scroll down to Upstream DNS Servers -> Private Reverse DNS Servers.
Enter the Unbound server configured earlier in the OPNsense settings, opnsense-ip:5353
Step 4: Rule for opnsense WAN interface
This step is interesting in a specific case: using double NAT and no wifi access point connected to the OPNSense firewall/router.
Now that AdGuard Home is active and protecting the portion of the LAN behind the firewall. We configure a network rule to allow equipment connected on the first LAN (LAN1 of the double NAT connecting this equipment to the modem) to benefit from AdGuard Home protection.
In the OPNSense web interface, go to : Firewall -> Rules -> WAN and create a pass rule:
- Action: pass
- Protocol: TCP/UDP
- Source: [NAT (NAT1) subnet]: 10.0.0.1/24
- Destination: This firewall
- Port Dest: DNS(53)
- Description: Allow WAN for DNS

Credits
https://0x2142.com/how-to-set-up-adguard-on-opnsense/
https://samuelsson.dev/install-adguard-home-on-an-opnsense-router/
Comments powered by Disqus.